Building Amazing Wallet UI from Scratch in Flutter
09 Apr 2020 | Saheb Singh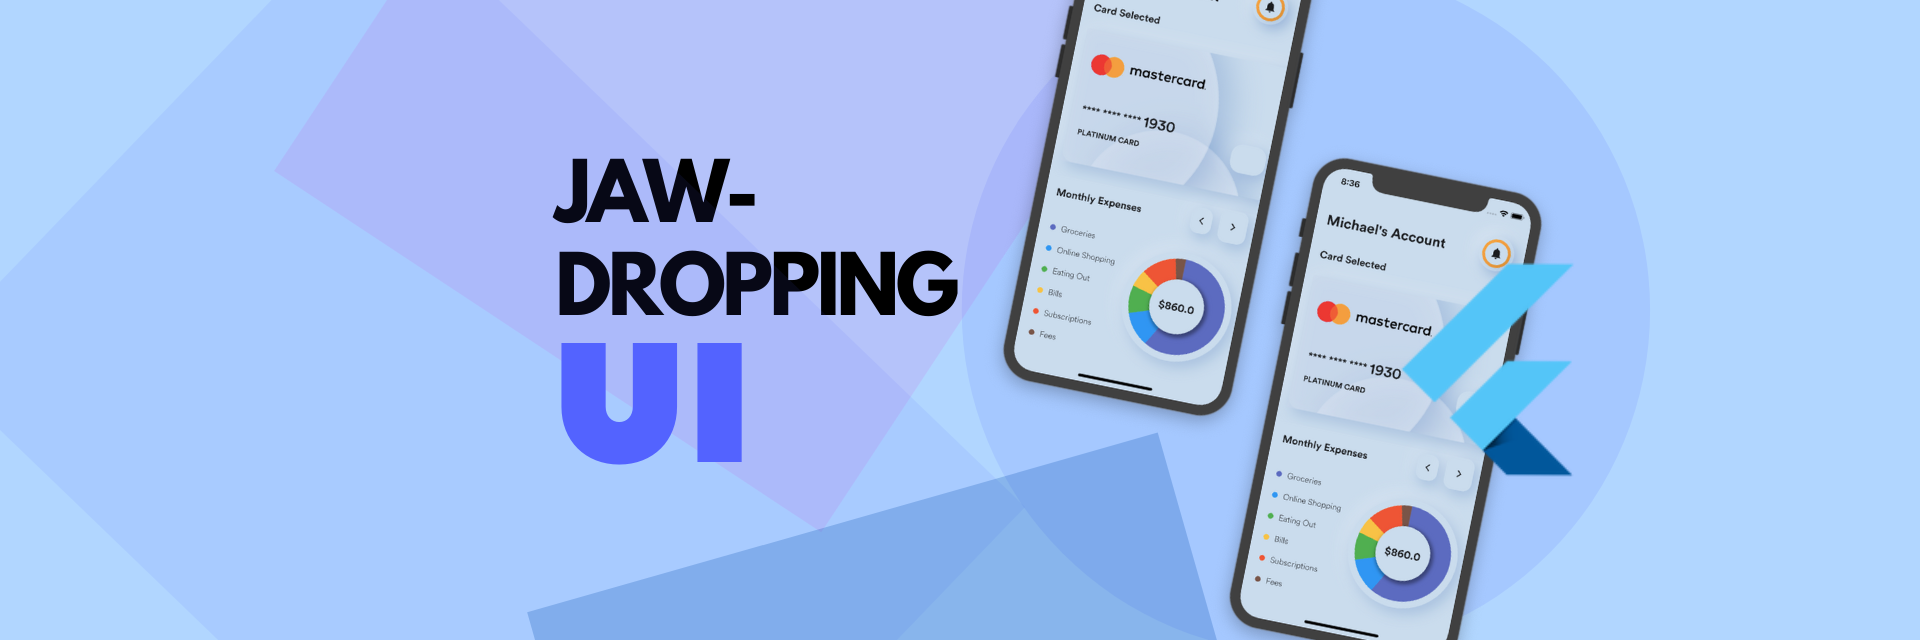
The UI just looks crisp and amazing but at the same time pretty complex right? Don't worry , this guide will walk you through all the steps and in the atmost simplest ways.
If you prefer watching the video , then I just uploaded the video for this UI on my youtube channel The Growing Developer , The video is embedded below :)
Start by creating a new flutter project. You can either use Android Studio or Visual Studio Code and if you prefer terminal then run the below command in your preferred terminal
flutter create wallet_ui(or any name you want)
No head to your "lib" folder and you will find the main.dart file, this is the entry point for your flutter application and we will write the code to initialise our app in this file.Copy the below code in your main.dart file and I'll explain you a little.
import 'package:flutter/material.dart';

import 'dashboard.dart';

void main() => runApp(MyApp());

class MyApp extends StatelessWidget {
  // This widget is the root of your application.
  @override
  Widget build(BuildContext context) {
    return MaterialApp(
      title: 'Bank Expenses',
      home: DashboardPage(),
      theme: ThemeData(fontFamily: "Circular"),
      debugShowCheckedModeBanner: false,
    );
  }
}
- As you can see that we have declared our main() function and inside that we have called our runApp() function which has the MyApp() object in it which in turn return the MaterialApp widget which is responsible for attaching our flutter app to the view.
- The ThemeData is having the fontFamily parameter set up as "Circular" i.e I am using custom fonts in my application.You can get the fonts from my github repo(link at the end)
DashboardPage()
Make a new file and name it as dashboard.dart ,copy the below code in the dashboard.dart file and will explain you a little
class DashboardPage extends StatefulWidget {
  @override
  _DashboardPageState createState() => _DashboardPageState();
}

class _DashboardPageState extends State<DashboardPage> {
  @override
  Widget build(BuildContext context) {
    var height = SizeConfig.getHeight(context);
    var width = SizeConfig.getWidth(context);

    return Scaffold(
      body: Container(
        color: AppColors.primaryWhite,
        child: SafeArea(
          child: Column(
            children: <Widget>[
              Container(
                height: height / 8,
                child: CustomAppBar(),
              ),
              Expanded(
                child: CardWidget(),
              ),
              Expanded(child: ExpensesWidget())
            ],
          ),
        ),
      ),
    );
  }
}
- CustomAppBar() is our custom built app bar widget
- CardWidget() contains the code for making or card UI
- ExpensesWidget() contains the expense list and the pie chart logic
All the widgets are passed inside a Column to arrange them in vertical direction, Expanded() is used to equally spread the CardWidget() and ExpensesWidget()
SizeConfig is just a class that I made to get the dynamic height and width of the screen.You can replace it by the following line
//MediaQuery.of(context).size.width/height
CardWidget():
class CardWidget extends StatefulWidget {
  @override
  _CardWidgetState createState() => _CardWidgetState();
}

class _CardWidgetState extends State<CardWidget> {
  @override
  Widget build(BuildContext context) {
    var height = SizeConfig.getHeight(context);
    var width = SizeConfig.getWidth(context);
    double fontSize(double size) {
      return size * width / 414;
    }

    return Column(
      children: <Widget>[
        Container(
            margin: EdgeInsets.symmetric(horizontal: width / 20),
            alignment: Alignment.centerLeft,
            child: Text(
              "Card Selected",
              style: TextStyle(
                  fontWeight: FontWeight.bold, fontSize: fontSize(20)),
            )),
        Expanded(
            child: ListView.builder(
                scrollDirection: Axis.horizontal,
                itemCount: 2,
                physics: BouncingScrollPhysics(),
                itemBuilder: (context, index) {
                  return Container(
                    width: width,
                    decoration: BoxDecoration(
                        boxShadow: AppColors.neumorpShadow,
                        color: AppColors.primaryWhite,
                        borderRadius: BorderRadius.circular(20)),
                    margin: EdgeInsets.symmetric(
                        horizontal: width / 25, vertical: height / 30),
                    child: Stack(
                      children: <Widget>[
                         Positioned.fill(
                          top: 150,
                          bottom: -200,
                          left: 0,
                          child: Container(
                            decoration: BoxDecoration(boxShadow: [
                              BoxShadow(
                                  color: Colors.blue[900].withOpacity(0.2),
                                  blurRadius: 50,
                                  spreadRadius: 2,
                                  offset: Offset(20, 0)),
                                   BoxShadow(
                                  color: Colors.white12,
                                  blurRadius: 0,
                                  spreadRadius: -2,
                                  offset: Offset(0, 0)),
                            ], shape: BoxShape.circle, color: Colors.white30),
                          ),
                        ),
                        Positioned.fill(
                          top: -100,
                          bottom: -100,
                          left: -300,
                          child: Container(
                            decoration: BoxDecoration(boxShadow: [
                              BoxShadow(
                                  color: Colors.blue[900].withOpacity(0.2),
                                  blurRadius: 50,
                                  spreadRadius: 2,
                                  offset: Offset(20, 0)),
                                   BoxShadow(
                                  color: Colors.white12,
                                  blurRadius: 0,
                                  spreadRadius: -2,
                                  offset: Offset(0, 0)),
                            ], shape: BoxShape.circle, color: Colors.white30),
                          ),
                        ),

                        BankCard(),
                      ],
                    ),
                  );
                })),
      ],
    );
  }
}
Stack and Positioned are used to give the Circles that you can see in the UI on the Credit Card.The card logo is a png image which is inside an images folder. Similarly for the BankCard() widget Alignment() is used to allign the details accordingly at different places on the card.
Below is the code fo the BankCard() widget
class BankCard extends StatelessWidget {
  @override
  Widget build(BuildContext context) {
    var height = SizeConfig.getHeight(context);
    var width = SizeConfig.getWidth(context);
    double fontSize(double size) {
      return size * width / 414;
    }

    return Container(
      padding:
          EdgeInsets.symmetric(horizontal: width / 20, vertical: height / 20),
      child: Stack(
        children: <Widget>[
          Align(
            alignment: Alignment.topLeft,
            child: Container(
                alignment: Alignment.topLeft,
                width: width / 1.8,
                child: Image.asset(
                  "assets/mastercardlogo.png",
                  fit: BoxFit.fill,
                )),
          ),
          Align(
              alignment: Alignment.bottomLeft,
              child: Container(
                height: height / 10,
                width: width / 1.9,
                child: Column(
                  mainAxisAlignment: MainAxisAlignment.spaceAround,
                  crossAxisAlignment: CrossAxisAlignment.start,
                  children: <Widget>[
                    Row(
                      children: <Widget>[
                        Text(
                          "**** **** **** ",
                          style: TextStyle(
                              fontSize: fontSize(20),
                              fontWeight: FontWeight.w500),
                        ),
                        Text(
                          "1930",
                          style: TextStyle(
                              fontSize: fontSize(30),
                              fontWeight: FontWeight.w500),
                        )
                      ],
                    ),
                    Text(
                      "Platinum Card".toUpperCase(),
                      style: TextStyle(
                          fontSize: fontSize(15), fontWeight: FontWeight.bold),
                    )
                  ],
                ),
              )),
          Align(
            alignment: Alignment.bottomRight,
            child: Container(
              alignment: Alignment.bottomRight,
              width: width / 6,
              height: height / 16,
              decoration: BoxDecoration(
                  color: AppColors.primaryWhite,
                  boxShadow: AppColors.neumorpShadow,
                  borderRadius: BorderRadius.circular(20)),
            ),
          ),
        ],
      ),
    );
  }
}
ExpensesWidget()
The expenses widget will have a Row and as it's children we wil first pass he list of expenses and then our pieChart which is custom made using the CustomPainter provided by the flutter tem.
The list of expenses is pretty straight forward , all you have to do is make a ListView.builder and use the expenses list to make widget out of it.Look at the below code to understand
class ExpensesWidget extends StatefulWidget {
  @override
  _ExpensesWidgetState createState() => _ExpensesWidgetState();
}

class _ExpensesWidgetState extends State<ExpensesWidget> {
  @override
  Widget build(BuildContext context) {
    var height = SizeConfig.getHeight(context);
    var width = SizeConfig.getWidth(context);
    double fontSize(double size) {
      return size * width / 414;
    }

    return Column(
      crossAxisAlignment: CrossAxisAlignment.center,
      children: <Widget>[
        Container(
          height: height / 14,
          child: Row(
            mainAxisAlignment: MainAxisAlignment.spaceBetween,
            children: <Widget>[
              Container(
                  margin: EdgeInsets.only(left: width / 20),
                  child: Text(
                    "Monthly Expenses",
                    style: TextStyle(
                        fontWeight: FontWeight.bold, fontSize: fontSize(20)),
                  )),
              Container(
                width: width / 3.5,
                margin: EdgeInsets.only(right: width / 30),
                child: Row(
                  children: <Widget>[
                    ArrowButton(
                      margin: EdgeInsets.symmetric(horizontal: 6, vertical: 6),
                      icon: Icon(
                        Icons.arrow_back_ios,
                        size: fontSize(17),
                      ),
                    ),
                    Padding(padding: EdgeInsets.only(left: width / 50)),
                    ArrowButton(
                      icon: Icon(
                        Icons.arrow_forward_ios,
                        size: fontSize(17),
                      ),
                    )
                  ],
                ),
              )
            ],
          ),
        ),
        Expanded(
          child: Row(
            children: <Widget>[
              Expanded(
                flex: 5,
                child: Center(
                  child: Column(
                    mainAxisAlignment: MainAxisAlignment.center,
                    children: category.map((data) {
                      return Container(
                        padding: EdgeInsets.symmetric(
                            horizontal: 20, vertical: 10),
                        child: Row(
                          children: <Widget>[
                            Container(
                              margin: EdgeInsets.only(right: 10),
                              width: 10,
                              height: 10,
                              decoration: BoxDecoration(
                                  color: AppColors
                                      .pieColors[category.indexOf(data)],
                                  shape: BoxShape.circle),
                            ),
                            Text(
                              data['name'],
                              style: TextStyle(
                                fontSize: fontSize(16),
                              ),
                            )
                          ],
                        ),
                      );
                    }).toList(),
                  ),
                ),
              ),
              Expanded(
                flex: 6,
                child: Padding(
                  padding: EdgeInsets.only(right: 10),
                  child: PieChart(),
                ),
              ),
            ],
          ),
        ),
      ],
    );
  }
}
Now our next task is to create the PieChart , to get the area of the expense we will calculate the total expenses and divide each expense by the total to get the percentage of the expense and make the arc accordingly. The entire logic is explained in the video above. Let's quickly see the code written inside the PieChart class
class PieChart extends StatefulWidget {
  @override
  _PieChartState createState() => _PieChartState();
}

class _PieChartState extends State<PieChart>
    with SingleTickerProviderStateMixin {
  double total = 0;
  @override
  void initState() {

    super.initState();
    category.forEach((e) => total += e['amount']);
  }

  @override
  Widget build(BuildContext context) {

    var width = SizeConfig.getWidth(context);
    double fontSize(double size) {
      return size * width / 414;
    }

    return LayoutBuilder(
      builder: (context, constraint) {
        return Container(
          decoration: BoxDecoration(
              color: AppColors.primaryWhite,
              shape: BoxShape.circle,
              boxShadow: AppColors.neumorpShadow),
          child: Stack(
            children: <Widget>[
              Center(
                child: SizedBox(
                  width: constraint.maxWidth * 0.6,
                  child: CustomPaint(
                    child: Container(),
                    foregroundPainter: PieChartCustomPainter(
                        width: constraint.maxWidth * 0.5,
                        categories: category,
                       ),
                  ),
                ),
              ),
              Center(
                child: Container(
                  width: constraint.maxWidth * .5,
                  decoration: BoxDecoration(
                      color: AppColors.primaryWhite,
                      shape: BoxShape.circle,
                      boxShadow: [
                        BoxShadow(
                            spreadRadius: 3,
                            blurRadius: 5,
                            offset: Offset(3, 3),
                            color: Colors.black38)
                      ]),
                  child: Center(
                      child: Text(
                    "\$" + total.toString(),
                    style: TextStyle(
                        fontWeight: FontWeight.bold, fontSize: fontSize(22)),
                  )),
                ),
              )
            ],
          ),
        );
      },
    );
  }
}
PieChartCustomPainter() class:
class PieChartCustomPainter extends CustomPainter {
  final List categories;
  final double width;
  PieChartCustomPainter({this.categories, this.width});
  @override
  void paint(Canvas canvas, Size size) {
    Offset center = Offset(size.width / 2, size.height / 2);
    double radius = min(size.width / 2, size.height / 2);
    double total = 0;
    double startRadian = -pi / 2;
    var paint = Paint()
      ..style = PaintingStyle.stroke
      ..strokeWidth = width / 1.8;
    categories.forEach((f) => total += f['amount']);
    for (var i = 0; i < categories.length; i++) {
      final currentCategory = categories[i];
      final sweepRadian = (currentCategory['amount'] / total ) * 2  * pi;
      paint.color = AppColors.pieColors[i];
      canvas.drawArc(Rect.fromCircle(center: center, radius: radius),
          startRadian, sweepRadian, false, paint);
      startRadian += sweepRadian;
    }
  }

  @override
  bool shouldRepaint(CustomPainter oldDelegate) => true;
}
I think now is the time to wrap up the blog here. Do watch the video on my youtube channel to get a better understanding on the entire project structure.
You can also get the souce code on my github repo:
Link to Github repo